It's time to post a new update....
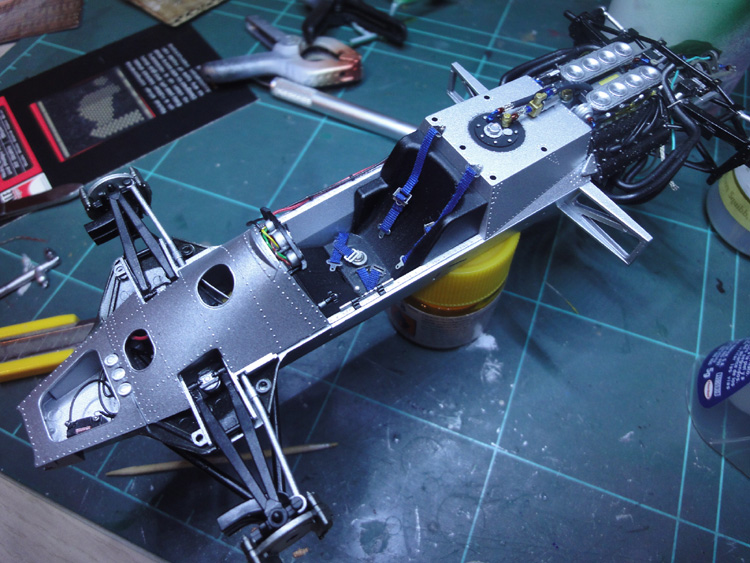
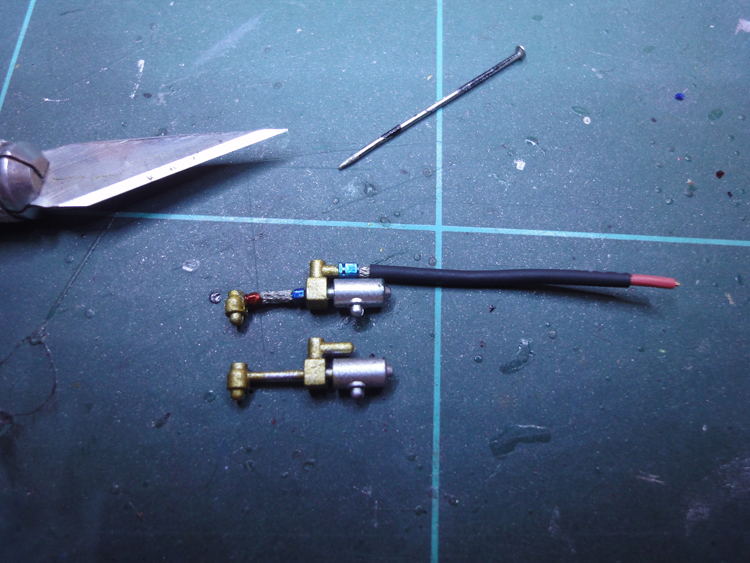
I worked on the detailing of the rebaque version. I painted the battery that's placed on the nose and added a piece of a spare decal, two rivets and some wiring. Some more wiring were glued to the oil cilinders and behind the velocity stacks.
I also worked on the martini version. I wasn't happy with the paint (some orange peel was visible) and sanded all body parts and painted them again. The seatbelts were glued on both cars too.
And finally I couldn't resist to make a little test fitting.....
Yesterday I started the work on decaling the body parts, so I hope I'll post a new update soon!
rebaque version
martini version
10.21.2012
9.12.2012
lotus 79 rebaque / martini -04
the work on both lotus is going slowly....
I've been working on the details over the fuel cell. As you can see in the picture, the original tamiya part is all made in plastic and I cut it in two parts and added two brailed lines.
I also used an old guitar string to simulate the little springs attaching the exhaust pipes.
Now I have the engine glued to the fuel cell, a little more work is needed before I will start working on the front of the car.
I've been working on the details over the fuel cell. As you can see in the picture, the original tamiya part is all made in plastic and I cut it in two parts and added two brailed lines.
I also used an old guitar string to simulate the little springs attaching the exhaust pipes.
Now I have the engine glued to the fuel cell, a little more work is needed before I will start working on the front of the car.
9.06.2012
lotus 79 rebaque / martini -03
Another little update!
I've been working on the engines of both cars. Finally I decided to give more detail to one of them as I will display one of the cars with the cowling off but I still haven't decided which will be....
The hose joints are from Hobby design and I painted them with clear red and clear blue and the braid line is from Tuner model Factory. I will try to build the exhausts this week and glue the engines to the cars soon!
I also masked the black circles over the copckit and painted them with matt black. So now I can work this parts!
I hope next update will be faster than this one....
7.20.2012
lotus 79 rebaque / martini -02
a little update... I painted the rims of both cars and masked them before painting the tire logos. Finally I airbrushed the logos using a stencil I had from the ferrari 126C2. It was quite difficult because the sides of the tires are rounded. Anyway, the result is not perfect but acceptable.
I also built the seat belts. I always use an old tamiya's driver figure to measure the length of the cloth. The harness are from the fantastic set of KA models and the cloth material is from an old perfect parts seat belt set.
Finally I could start the work on the engines. The first part I built is the gearbox and rear suspension. I hand-painted the springs instead replacing them with metal spring because they will be not very visible once the cars will be finished. I ordered some hobby design's metal hose joints at spotmodel so I hope I will be able to finish the engines next week.
More updates soon.... thanks to all!
I also built the seat belts. I always use an old tamiya's driver figure to measure the length of the cloth. The harness are from the fantastic set of KA models and the cloth material is from an old perfect parts seat belt set.
Finally I could start the work on the engines. The first part I built is the gearbox and rear suspension. I hand-painted the springs instead replacing them with metal spring because they will be not very visible once the cars will be finished. I ordered some hobby design's metal hose joints at spotmodel so I hope I will be able to finish the engines next week.
More updates soon.... thanks to all!
5.16.2012
lotus79 rebaque -01
I also started the lotus 79 rebaque's version! As I did with the lotus 79 martini, I started cutting all the pieces from the sprue and prepared them to prime and paint.
I painted the body pieces with rebaque's brown form zero paints. I like this color! Nest step will be sand the pieces and airbrush a first clear coat before apply the decals to prevent the silvering.
I also started the work on the wheels. The first step was to sand the surface to delete the shine and to give to them a "used" look.
lotus79 martini -01
Finally I could start the work on the two lotus 79! As always, the first steps are quite boring but necessary!
I cut all the pieces form the sprue and separate by colors before painting them.
I also cut the body parts.
Finally all parts are ready to prime and paint......
I primed all parts with tamiya's white primer and I airbrushed the colors. I also masked the inner parts and painted them with flat black
I couldn't wait to make a little fitting test!hobby design - F2003GA detail set
Today I received the hobby design's 1/20 Ferrari F2003GA detail set. As all of their products it's a great set! I can't wait to use it it soon building the F2003 from Fujimi!
3.09.2012
F2007- 09
2.14.2012
F60-07
Subscribe to:
Posts (Atom)