7.22.2011

F2007 -03

After some months I worked on the F2007 again...The fujimi kit has the lower part of the copckit in one single piece and I cut it to separate the nose part.

Both parts of the nose cone where glued and I drilled the hole in the front but I didn't like the result I had....
So I filled the hole with epoxi and sanded hardly until I get a smooth surface.

Then I started the work on the body. I glued all the parts, filled the gaps, sanded and now they are ready to paint.

F60-06

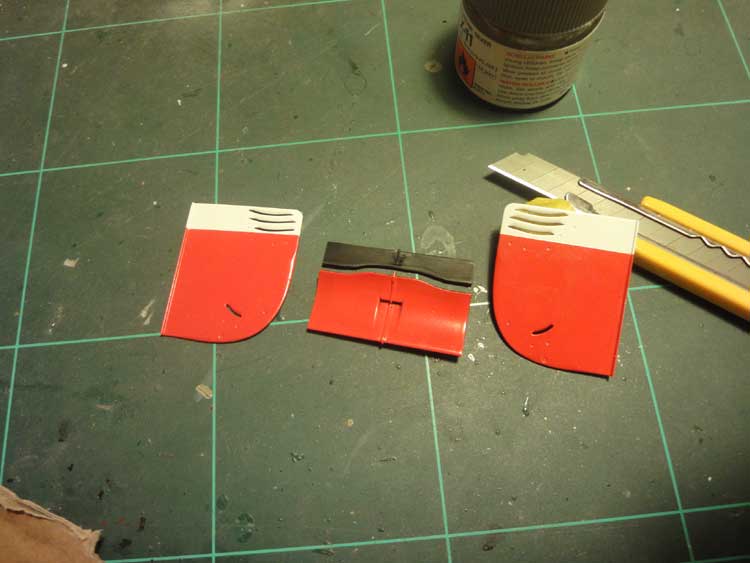
Don't ask me why, but I lost the upper part of the rear wing....
As I couldn't find a spare one, I took the upper part of the mp4/13 rear wing. I sanded it to obtain a similar shape.

Finally I cut it and painted with white primer and TS-85

Not the best one, but I'm happy with the result.
I used a string guitar to build the antennas.
And glued them on their place and also glued some bolts on the body.

The last stage, I airbrushed three coats of TS-13. I masked the parts where I wanted to keep the matt black.

The car is near to be finished! Only I need to attach the wheels. so I'll post some pictures of the finished car soon!

5.28.2011

F60 -05

The decals are on their place.

I glued the sidepods, the camera on the top and the mirrors. Some PE bolts and rivets were also glued on the body. I will wait some days and I'll airbrush the clear coat.


new tool and models

We have new kids on town! The first one is a new airbrush. It's an iwata revolution (0,5mm needle). It's time to retire my old ABS300!

Tamiya's M23 in 1/20! (and some tobacco decals.....) this has been the holy grail for the modelers during many years, as it was really difficult to find.
This is a reedition of the original, but I'm happy I will be able to build it!
And finally, the tamiya's lotus 79 martini livery. I also bought the rebaque livery decals to use with the other lotus 79 I bought some months ago. Maybe they will be the next cars I will build......

F60 -04

I'm back! I'm sorry I didn't post any update in the last months but after a year working on the mclaren I was a bit tired of modeling and I needed to take a break! I tried to use some CF decals on the floor and on the suspension arms but I was not happy with the results and finally I decided to build the car "out of the box" without many details added.
I glued the copckit parts and also the front suspension arms and the front brakes.

In the kit there are some kevlar decals to use on some aerodynamic parts. These decals are nice but too glossy in my opinion.

So I airbrushed a very thin layer of flat black to tone down the shining of the kevlar.

As I told before, I tried to use some CF decals but they didn't worked as I wanted (maybe they were too old...), so I decided to try the method to paint flat black through a mesh over the semigloss black.

I know it's not 100% accurated but I'm happy with the result.

Finally I glued the copckit to the floor and also worked on the engine (without detailing it as it won't be seen due the car will be curbside).

It's time to start decaling!

11.08.2010

F60 -03

I made a big mistake! I didn't test the position of the green circles before airbrushing the logos and when I did it... the logos were touching the circles....
So I decided to sand the logos and start again using the tyre logos decals instead of airbrushing them. The fisrt step was a first layer of gloss clear.
Then I started decalling the circles and the logos. Finally I airbrushed another layer of gloss clear, two layers of matt clear and finally I airbrushed a very thin layer of smoke+matt black to tone done the shinning.
I worked on the body parts. Two layers of white primmer and a little sanding work with #1000 and #2000 grade sandpaper.
Finally I painted the body parts with TS-85. First I painted two layers, tomorrow I'll sand them and will paint a final layer.
I also finished the work on the seat using a KA models p.e. seatbelts set (instead the tamiya's one). The clothes are from an old perfect parts seatbelts set. More updates soon!

F2007 -02

The wheels are finished. I used tyre logo decals, two layers of gloss clear (one before applying the decals and one after), one layer of matt clear and a thin layer of matt black.
The seat is also finished. I used a KA seatbelts p.e. set. Today I will start to work on the body of the F2007.

10.11.2010

F60 -02

Three holes were drilled on the seat, sanded and painted it with flat black. Tonight I will start the job on the seatbelts.
The inner parts of the car are painted with semigloss black.
I airbrushed the tyre logos using the template given by tamiya. I will let them dry for two days and I'll apply the green circles decals.
I also finished the steering wheel.....it was really difficult to paint those small buttons but I'm happy with the result!
I also decaled it with some CF decals, the picture is not very good but it really looks fine.
More updates soon!!!!

F2007 -01

This is the 1/20 fujimi kit, and I will try to build it at the same time with the F60. It will be curbside too and I'll try to build the late season version, the one with the metallic red.
I started working on the wheels. In 2007 the soft wheels had a line painted in white, so I started masking the tyres.
It's done! next step will be apply the logos and start working on the body.


new models

Four new kits arrived at home! The williams fw-16 was one of the kits I always wanted to build and finally it was released in plastic! I also bought the latest tamiya kit, lotus 79. I was planning to build the "martini" livery, but as it will be also released soon by Tamiya, I will build the "rebaque" version (with the car painted in brown)
These two are very special, as they were missing in my tamiya collection... I bought them in ebay at 15$ each... really a bargain!
welcome at home, guys!