11.27.2009

mclaren mp4/13 -04

A little update. The painting process of the different parts is so slow... I started working on the brake disks. The disks on the top studio set are presented in two parts. The p.e. part was very easy to glue and fitted perfectly.
Once glued, I primed the disks with grey primmer. I also airbrushed the brake calipers.
I also started working on the wood plank on the floor. I sanded it smoothly and masked the plank.
It's done! the painting process was: first layer of white primer, 2 layers of light sand colour, then I airbrushed some layers of different mixtures of flat earth and brown and also some flat black. Once dried, I sanded carefully some wood lines using a rough sandpaper and airbrhused again a light coats of different browns.

11.16.2009

mclaren mp4/13 -03

I glued all the floor parts and sanded the joint. I also sanded the injection marks.
The different parts of the nose were also glued and sanded.
I made a template of the copckit interior walls.
And decalled them with carbon fiber decals.
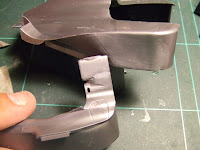
Finally I glued the 2 parts of the copckit. When the glue dried, I sanded the joint with 400, 800, 1000 and 1500 sandpaper.
I painted the body parts with 2 layers of grey primer. I let them dry two days, sanded them carefully and painted one layer of white primer, I sanded them again and painted a final layer of white primer.
I sanded the second white layer again and airbrushed a first layer of mclaren orange from zero paints.
The body parts are painted. I'll wait some more days to let the paint dry, I will sand them again and I will paint two final coats of orange.


Today I will start working on the engine.

11.02.2009

mclaren mp4/13 -02

After few weeks working on a plane that a friend asked to me, I could start working on the mp4/13.
I'll try to show to you all the steps of this WIP.
First of all I painted all the inner parts with flat black.
As the test car don't use cameras on board, I cut the camera on the top of the body.
I also cut the moulded parts to join the cone nose.
A first test fitting. This part will be covered with a photoetched plate.
The guiding lines to paint the GP version were sanded.
I glued the different parts of the cowling and sanded the joint. The hole to put the camera was also filled with putty and sanded.
As I don't want to put the seat before to paint the body, I opened the hole under the body to make it bigger to put the seat from the underside at the final time.

10.10.2009

mclaren mp4/13 -01

This is my next project: the mclaren mp4/13 (test version).

I will build it as detailed as I can, and I will use the tamiya's mclaren kit, the superdetail set from topstudio and the logo and carbon fiber decals from scalemotorsport.
The tamiya kit is really great and I will use the japanese version, It has a different front & rear wing configuration.
The decals from scalemotorsport are great as usual, and I will paint the car using the zero paints' orange colour that I bought from hiroboy. I want to build the driver's helmet, and I will use the helmets from el oso kits and the studio 27's decals from bestbalsakits.
The superdetail set from topstudio is just incredible and it worth every cent.
You can find there lots of resin and metal machined pieces to improve the brakes, the engine and the suspensions system.
They also add a bunch of wires with different diameters.
The photoetched parts are presented in three sheets.
The instructions set is very complete and clear. I downloaded it from their site and printed in a4.
And finally I printed some reference pictures that I found from different sites in the net wich will be very usefull to build the car.


Now, I only have to start to work on it.....

10.04.2009

benetton B192 -10

And finally the benetton B192 is finished! I'll put some more pictures in the gallery of my website soon.


thank you to all again!
july 2009-october 2009

9.30.2009

benetton B192 -09

The decalling job finished.
I glued some nuts & bolts here and there using a toothpick and cyano glue.
I drilled two Ø0.5mm holes on the side of the cowling were the antennas will be placed.
Finally I glued the antennas, the brakes and the rear wing. Once the decals will be completely dried, I will clearcoat all with some layers of TS-13.

9.24.2009

benetton B192 -08

A little update... the cowling and the nose are glued. I'm happy to see that there isn't a big gap between the green joint on the different parts.
And finally I could start the decalling job.

9.22.2009

benetton B192 -07

The floor plan was decalled with sms carbon fiber decals.
As the decals are too much greyish, I airbrushed a mixture of 80% smoke+20% semigloss black to turn them darker. I like the final result.
I glued the front and rear wings.
I built the engine and glued it on the floor plan. As the engine won't be visible, I didn't put too effort to detail it and I also take off some parts to have a better fitment of the cowling.
Finally I glued the cowling to the body. I'll start the decalling job tonight.

9.14.2009

benetton B192 -06

I applied all decals on the rims, glued the air valves and clearcoated them with two layers of TS-13.
The moulding line on the tyres were sanded.
I airbrushed the logos on the tyres using a template and weathered them with a mist coat of smoke+flat black.
I masked the sidepods and airbrushed them with semigloss black.
The copckit was glued in its place and finished the nose cone decal.
I scratchbuilt the brakes wiring using vynil tub and cooper wire.
Finally I glued the front suspension arms.